LIGHT SHARE.
4 people share 3 avaiable lights via an automated, web based smart system.
This system regulates and measures the amount of light in each persons room, sending and recieving sensor data via www.pachube.com
A plastic cowling, with an LDR, covers the original switch. A servo inside flips the switch depending on your light usage.
Light Share measures the duration and the intensity of available light in each persons room, adding these values then sending them as a single stream.
The participants have no direct control over thier light. If you have used more light than the others your light will switch off to wait for someone else to get gready!!!...
The basic premise of this project is to spotlight the way we use electricity on a day-to-day basis and to impliment a smart system that distributes this resource more evenly between users, across a network.
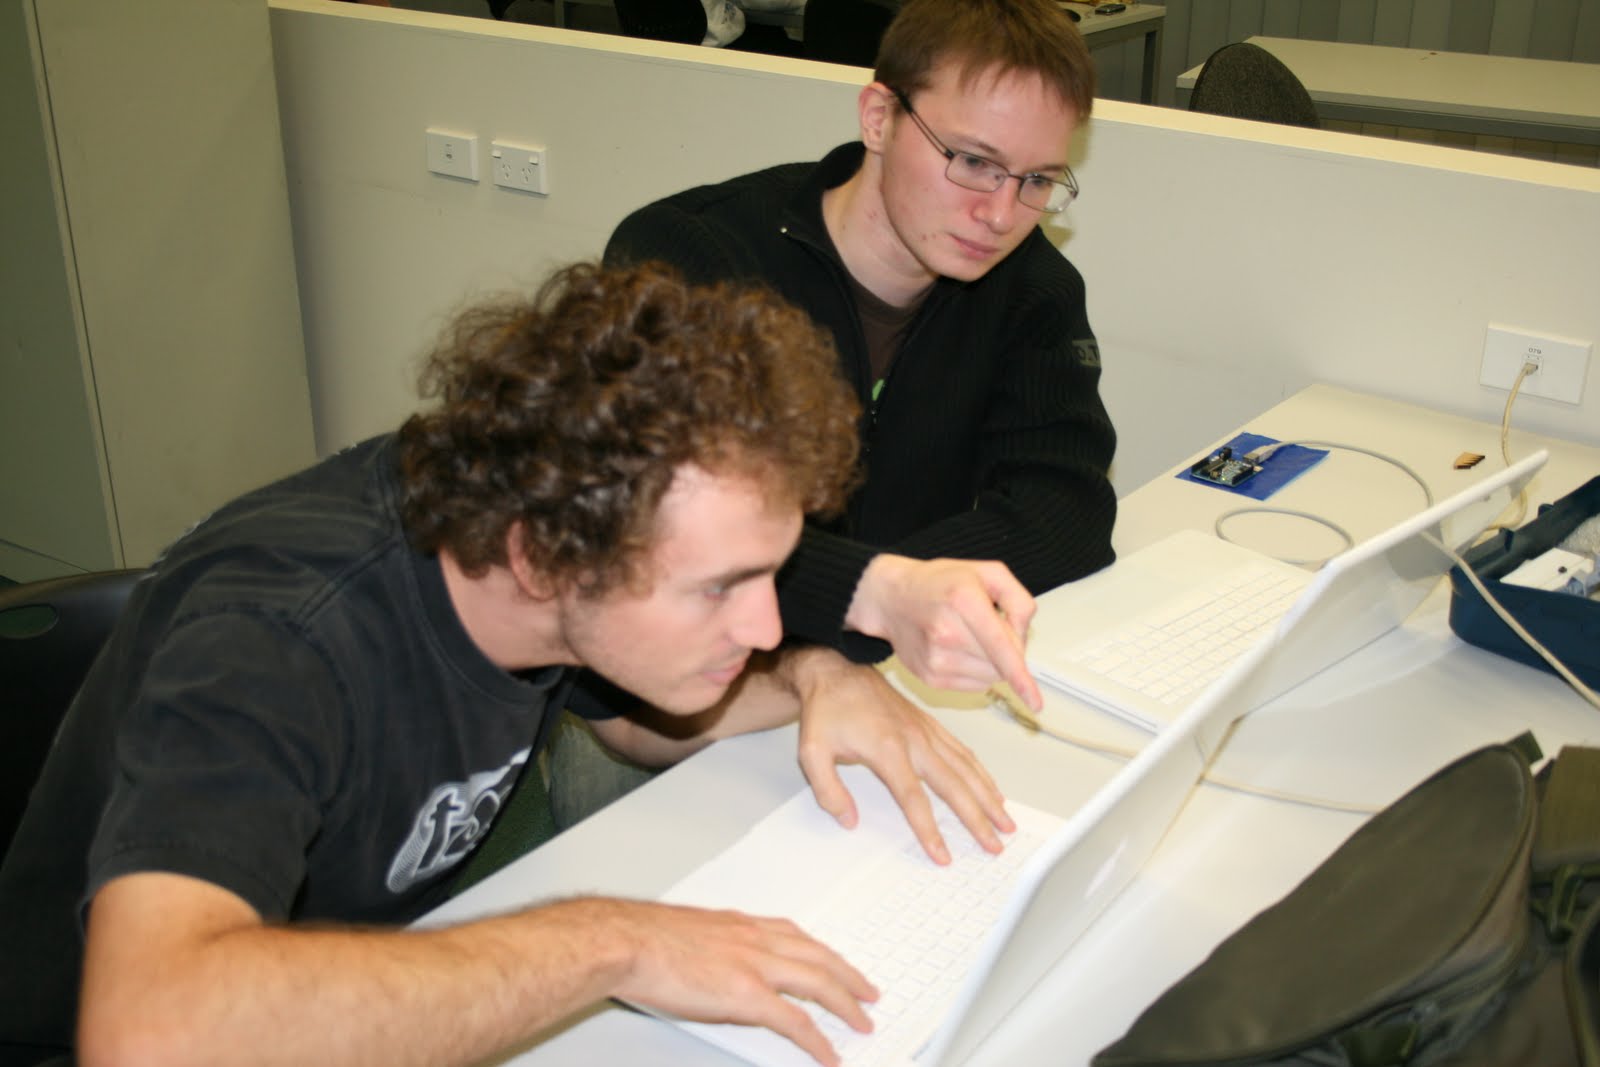
For this project we have covered a lot of ground. We worked hard together to achieve our final, working result of LIGHT SHARE. We used multiple methods for troubleshooting and building our code and have pushed what has been done before.
Basically, like the rest of my team, I was involved in all stages of development of this project - conceptualising and generating ideas, concept refinement, coding and recoding, remote and local troubleshooting, building the light boxes, aesthetic design, etc. We functioned as an integrated team, feeding individual developments back into the communal pool. This was truely a group achievement.
While the LIGHT SHARE smart system network was running we group conferenced via skype. It was peculiar seeing my group members at the mercy of the system, having no control over their lights. When my light got switched off it was even more unsettling - I was unnerved by my lack of control and felt loss for the mundane luxury of being able to waste as much light as I want with no thought for how this affects my peers (local and global).
In future I will try to be more fair and responsible with my electricity usage because I've realised I dont want to get to the stage where we are governed so directly by big brother as I was in the LIGHT SHARE network... Given the state of our dwindling global resources and the rate at which we are using them, this is not an unrealistic possibility.
Sunday, June 13, 2010


Tuesday, June 8, 2010
LIGHT SHARE PACHUINO CODE - USING ARDUINO AND PROCESSING TO CREATE AN AUTOMATED, WEB BASED SMART SYSTEM
Ver 1
import eeml.*;
import processing.serial.*;
import cc.arduino.*;
Arduino arduino;
float myVariable;
DataOut dOut;
float lastUpdate;
int buttonState = 0;
DataIn dIn;
void setup()
{
size (180, 50);
dIn = new DataIn(this,"http://www.pachube.com/api/feeds/7339.xml",
"API_KEY", 5000);
arduino = new Arduino(this, Arduino.list()[0]);
arduino.pinMode(10, Arduino.SERVO);
dOut = new DataOut(this, "http://www.pachube.com/api/feeds/7584.xml",
"API_KEY");
dOut.addData(2,"button");
arduino = new Arduino (this, Arduino.list()[0],57600);
arduino.pinMode(2,arduino.INPUT);
}
void draw()
{
if (myVariable == 0.0)
{
arduino.analogWrite(10, 0);
println("off");
}
else
{
println("on");
arduino.analogWrite(10, 180);
}
if ((millis() - lastUpdate) > 7000)
{
buttonState=arduino.digitalRead(2);
println("ready to POST: ");
dOut.update(0, buttonState);
int response = dOut.updatePachube();
println(response);
lastUpdate = millis();
}
}
void onReceiveEEML(DataIn d)
{
myVariable = d.getValue(2);
println(myVariable);
}
Ver 2
import eeml.*;
import processing.serial.*;
import cc.arduino.*;
import pachuino.*;
Pachuino p;
float lastUpdate;
float jacquesBtn;
float jacquesLdr;
float tapaniBtn;
float tapaniLdr;
float seamusBtn;
float seamusLdr;
float juditBtn;
float juditLdr;
void setup()
{
p = new Pachuino(this, Arduino.list()[0], 57600);
p.manualUpdate("http://www.pachube.com/api/7344.xml");
p.setKey("API_KEY");
p.addRemoteSensor("http://www.pachube.com/api/7344.xml", 0); // jacques button
p.addRemoteSensor("http://www.pachube.com/api/7344.xml", 2); // jacques ldr
p.addRemoteSensor("http://www.pachube.com/api/7339.xml", 2); // tapani button
p.addRemoteSensor("http://www.pachube.com/api/7339.xml", 3); // tapani ldr
p.addRemoteSensor("http://www.pachube.com/api/7472.xml", 2); // seamus button
p.addRemoteSensor("http://www.pachube.com/api/7472.xml", 3); // seamus ldr
p.addRemoteSensor("http://www.pachube.com/api/7472.xml", 0); // judit button
p.addRemoteSensor("http://www.pachube.com/api/7472.xml", 1); // judit ldr
p.addLocalSensor("digital", 2, "button");
//p.addLocalSensor("digital", 9, "servo");
p.addLocalSensor("analog", 3, "ldr");
}
void draw()
{
if ((millis() - lastUpdate) > 10000)
{
float lastUpdate;
jacquesBtn = p.remoteSensor[0].value;
jacquesLdr = p.remoteSensor[1].value;
tapaniBtn = p.remoteSensor[2].value;
tapaniLdr = p.remoteSensor[3].value;
seamusBtn = p.remoteSensor[4].value;
seamusLdr = p.remoteSensor[5].value;
juditBtn = p.remoteSensor[6].value;
juditLdr = p.remoteSensor[7].value;
if (jacquesBtn == 1.0)
{
p.analogWrite(9, 1);
println("off");
delay(500);
p.analogWrite(9, 0);
}
else if (jacquesBtn == 0.0)
{
if (jacquesLdr <= juditLdr jacquesLdr <= tapaniLdr jacquesLdr <= seamusLdr) { p.analogWrite(9, 180); println("on"); delay(500); p.analogWrite(9, 0); } else { println ("Sorry mate. You've got too much light already. HAHA!!"); } } lastUpdate = millis(); } } void onReceiveEEML(DataIn d) { p.updateRemoteSensors(d); }
Ver 3 - Bringing in Serial
import processing.serial.*; // import the Processing serial library
Serial myPort; // The serial port
boolean firstContact = false; // Whether we've heard from the microcontroller
boolean controlServo = false;
//setup for pachube recieving
import eeml.*;
DataIn dIn;
float myVariable;
//setup for pachube sending
DataOut dOut;
float lastUpdate;
int buttonState =0;
void setup() {
// List all the available serial ports
println(Serial.list());
myPort = new Serial(this, Serial.list()[0], 9600);
myPort.bufferUntil('\n');
dIn = new DataIn(this,"http://www.pachube.com/api/feeds/7472.xml",
"API_KEY", 3500);
//dIn = new DataIn(this,"http://www.pachube.com/api/feeds/7584.xml",
//"API_KEY", 3500);
//dIn = new DataIn(this,"http://www.pachube.com/api/feeds/7339.xml",
//"API_KEY", 3500);
dOut = new DataOut(this, "http://www.pachube.com/api/feeds/7344.xml",
"API_KEY");
dOut.addData(2,"LDR");
}
void draw() {
background(255);
}
void serialEvent(Serial myPort) {
// read the serial buffer:
String myString = myPort.readStringUntil('\n');
// if you got any bytes other than the linefeed:
if (myString != null) {
myString = trim(myString);
// if you haven't heard from the microncontroller yet, listen:
if (firstContact == false) {
if (myString.equals("hello")) {
myPort.clear(); // clear the serial port buffer
firstContact = true; // you've had first contact from the microcontroller
myPort.write('A'); // ask for more
//println(firstContact);
}
}
// if you have heard from the microcontroller, proceed:
else {
float recievedData = new Float(myVariable);
float myData = new Float(myString);
//println(recievedData);
//println(myData);
if (myData > recievedData){
myPort.write("B");
println("Seamus = " + recievedData);
println("Jacques = " + myData);
} else {
myPort.write("C");
println("Seamus = " + recievedData);
println("Jacques = " + myData);
}
//send data to pachube
if ((millis() - lastUpdate) > 7000){
println("ready to POST: ");
dOut.update(0, myString); // update the datastream
int response = dOut.updatePachube(); // updatePachube() updates by an authenticated PUT HTTP request
println(response); // should be 200 if successful; 401 if unauthorized; 404 if feed doesn't exist
lastUpdate = millis();
}
}
}
// when you've parsed the data you have, ask for more:
myPort.write("A");
}
void onReceiveEEML(DataIn d){
myVariable = d.getValue(2); // get the value of the stream 1
}
.
Final
This final LightShare code is based on Pachuino. It runs on the new Standard_Firmata, ver 2.1, code in Arduino 18. You must import 'pachuino', 'serial' and 'arduino' libraries into your processing sketchbook. The reason that we are able to use this code on pachube.com is the fact that we got whitelisted for the duration of the assignment. This meant that the data cap was removed. It is set up to listen for 1 set of local sensor data and 3 remote sensor feeds;
import processing.serial.*;
import eeml.*;
import cc.arduino.*;
import pachuino.*;
Pachuino p;
DataOut dOut;
float timer, scaledLDR;
float button;
float lastUpdate;
float jacquesLDR;
float tapaniLDR;
float seamusLDR;
float juditLDR;
PImage img;
void setup()
{
p = new Pachuino(this, Arduino.list()[0], 57600);
p.manualUpdate("http://www.pachube.com/api/7472.xml");
p.setKey("APIKEY_GOES_HERE");
dOut = new DataOut(this, "http://www.pachube.com/api/feeds/7472.xml",
"APIKEY_GOES_HERE");
dOut.addData(2,"CombinedLDR");
p.addRemoteSensor("http://www.pachube.com/api/7339.xml", 2); // tapani ldr
p.addRemoteSensor("http://www.pachube.com/api/7344.xml", 2); // jacques ldr
p.addRemoteSensor("http://www.pachube.com/api/7584.xml", 2); // judit ldr
p.addLocalSensor("analog", 1, "ldr");
p.addLocalSensor("analog", 2, "button");
size(600,581);
background(255);
}
void draw()
{
seamusLDR = p.localSensor[0].value;
button = p.localSensor[1].value;
tapaniLDR = p.remoteSensor[0].value;
jacquesLDR = p.remoteSensor[1].value;
juditLDR = p.remoteSensor[2].value;
dOut.update(0, timer);
int response = dOut.updatePachube();
if ((millis() - lastUpdate) > 5000)
{
lastUpdate = millis();
if (button > 10)
{
timer = timer + 1;
scaledLDR = seamusLDR/100;
timer = timer + scaledLDR;
delay(1000);
if (timer > jacquesLDR && timer > tapaniLDR && timer > juditLDR)
{
img = loadImage("mus.jpg");
image (img,0,0);
println("seamus = " + timer);
println("jacques = " + jacquesLDR);
println("tapani = " + tapaniLDR);
println("judit = " + juditLDR);
p.analogWrite(9, 1);
println("off");
delay(500);
p.analogWrite(9, 0);
}
else if (jacquesLDR > timer && jacquesLDR > tapaniLDR && jacquesLDR > juditLDR)
{
img = loadImage("jaak.jpg");
image (img,0,0);
println("seamus = " + timer);
println("jacques = " + jacquesLDR);
println("tapani = " + tapaniLDR);
println("judit = " + juditLDR);
p.analogWrite(9, 250);
println("on");
delay(500);
p.analogWrite(9, 0);
}
else if (juditLDR > timer && juditLDR > tapaniLDR && juditLDR > jacquesLDR)
{
img = loadImage("judit.jpg");
image (img,0,0);
println("seamus = " + timer);
println("jacques = " + jacquesLDR);
println("tapani = " + tapaniLDR);
println("judit = " + juditLDR);
p.analogWrite(9, 250);
println("on");
delay(500);
p.analogWrite(9, 0);
}
else if (tapaniLDR > timer && tapaniLDR > juditLDR && tapaniLDR > jacquesLDR)
{
img = loadImage("tap.jpg");
image (img,0,0);
println("seamus = " + timer);
println("jacques = " + jacquesLDR);
println("tapani = " + tapaniLDR);
println("judit = " + juditLDR);
p.analogWrite(9, 250);
println("on");
delay(500);
p.analogWrite(9, 0);
}
else
{
println("seamus = " + timer);
println("jacques = " + jacquesLDR);
println("tapani = " + tapaniLDR);
println("judit = " + juditLDR);
p.analogWrite(9, 250);
println("on");
delay(500);
p.analogWrite(9, 0);
}
}
else
{
println("seamus = " + 0);
println("jacques = " + jacquesLDR);
println("tapani = " + tapaniLDR);
println("judit = " + juditLDR);
p.analogWrite(9, 1);
println("off");
delay(500);
p.analogWrite(9, 0);
}
}
}
void onReceiveEEML(DataIn d)
{
p.updateRemoteSensors(d);
}
Using this code meant that we could separate the data coming from each persons feed, to deal with them separately in the if and else statements.
import eeml.*;
import processing.serial.*;
import cc.arduino.*;
Arduino arduino;
float myVariable;
DataOut dOut;
float lastUpdate;
int buttonState = 0;
DataIn dIn;
void setup()
{
size (180, 50);
dIn = new DataIn(this,"http://www.pachube.com/api/feeds/7339.xml",
"API_KEY", 5000);
arduino = new Arduino(this, Arduino.list()[0]);
arduino.pinMode(10, Arduino.SERVO);
dOut = new DataOut(this, "http://www.pachube.com/api/feeds/7584.xml",
"API_KEY");
dOut.addData(2,"button");
arduino = new Arduino (this, Arduino.list()[0],57600);
arduino.pinMode(2,arduino.INPUT);
}
void draw()
{
if (myVariable == 0.0)
{
arduino.analogWrite(10, 0);
println("off");
}
else
{
println("on");
arduino.analogWrite(10, 180);
}
if ((millis() - lastUpdate) > 7000)
{
buttonState=arduino.digitalRead(2);
println("ready to POST: ");
dOut.update(0, buttonState);
int response = dOut.updatePachube();
println(response);
lastUpdate = millis();
}
}
void onReceiveEEML(DataIn d)
{
myVariable = d.getValue(2);
println(myVariable);
}
Ver 2
import eeml.*;
import processing.serial.*;
import cc.arduino.*;
import pachuino.*;
Pachuino p;
float lastUpdate;
float jacquesBtn;
float jacquesLdr;
float tapaniBtn;
float tapaniLdr;
float seamusBtn;
float seamusLdr;
float juditBtn;
float juditLdr;
void setup()
{
p = new Pachuino(this, Arduino.list()[0], 57600);
p.manualUpdate("http://www.pachube.com/api/7344.xml");
p.setKey("API_KEY");
p.addRemoteSensor("http://www.pachube.com/api/7344.xml", 0); // jacques button
p.addRemoteSensor("http://www.pachube.com/api/7344.xml", 2); // jacques ldr
p.addRemoteSensor("http://www.pachube.com/api/7339.xml", 2); // tapani button
p.addRemoteSensor("http://www.pachube.com/api/7339.xml", 3); // tapani ldr
p.addRemoteSensor("http://www.pachube.com/api/7472.xml", 2); // seamus button
p.addRemoteSensor("http://www.pachube.com/api/7472.xml", 3); // seamus ldr
p.addRemoteSensor("http://www.pachube.com/api/7472.xml", 0); // judit button
p.addRemoteSensor("http://www.pachube.com/api/7472.xml", 1); // judit ldr
p.addLocalSensor("digital", 2, "button");
//p.addLocalSensor("digital", 9, "servo");
p.addLocalSensor("analog", 3, "ldr");
}
void draw()
{
if ((millis() - lastUpdate) > 10000)
{
float lastUpdate;
jacquesBtn = p.remoteSensor[0].value;
jacquesLdr = p.remoteSensor[1].value;
tapaniBtn = p.remoteSensor[2].value;
tapaniLdr = p.remoteSensor[3].value;
seamusBtn = p.remoteSensor[4].value;
seamusLdr = p.remoteSensor[5].value;
juditBtn = p.remoteSensor[6].value;
juditLdr = p.remoteSensor[7].value;
if (jacquesBtn == 1.0)
{
p.analogWrite(9, 1);
println("off");
delay(500);
p.analogWrite(9, 0);
}
else if (jacquesBtn == 0.0)
{
if (jacquesLdr <= juditLdr jacquesLdr <= tapaniLdr jacquesLdr <= seamusLdr) { p.analogWrite(9, 180); println("on"); delay(500); p.analogWrite(9, 0); } else { println ("Sorry mate. You've got too much light already. HAHA!!"); } } lastUpdate = millis(); } } void onReceiveEEML(DataIn d) { p.updateRemoteSensors(d); }
Ver 3 - Bringing in Serial
import processing.serial.*; // import the Processing serial library
Serial myPort; // The serial port
boolean firstContact = false; // Whether we've heard from the microcontroller
boolean controlServo = false;
//setup for pachube recieving
import eeml.*;
DataIn dIn;
float myVariable;
//setup for pachube sending
DataOut dOut;
float lastUpdate;
int buttonState =0;
void setup() {
// List all the available serial ports
println(Serial.list());
myPort = new Serial(this, Serial.list()[0], 9600);
myPort.bufferUntil('\n');
dIn = new DataIn(this,"http://www.pachube.com/api/feeds/7472.xml",
"API_KEY", 3500);
//dIn = new DataIn(this,"http://www.pachube.com/api/feeds/7584.xml",
//"API_KEY", 3500);
//dIn = new DataIn(this,"http://www.pachube.com/api/feeds/7339.xml",
//"API_KEY", 3500);
dOut = new DataOut(this, "http://www.pachube.com/api/feeds/7344.xml",
"API_KEY");
dOut.addData(2,"LDR");
}
void draw() {
background(255);
}
void serialEvent(Serial myPort) {
// read the serial buffer:
String myString = myPort.readStringUntil('\n');
// if you got any bytes other than the linefeed:
if (myString != null) {
myString = trim(myString);
// if you haven't heard from the microncontroller yet, listen:
if (firstContact == false) {
if (myString.equals("hello")) {
myPort.clear(); // clear the serial port buffer
firstContact = true; // you've had first contact from the microcontroller
myPort.write('A'); // ask for more
//println(firstContact);
}
}
// if you have heard from the microcontroller, proceed:
else {
float recievedData = new Float(myVariable);
float myData = new Float(myString);
//println(recievedData);
//println(myData);
if (myData > recievedData){
myPort.write("B");
println("Seamus = " + recievedData);
println("Jacques = " + myData);
} else {
myPort.write("C");
println("Seamus = " + recievedData);
println("Jacques = " + myData);
}
//send data to pachube
if ((millis() - lastUpdate) > 7000){
println("ready to POST: ");
dOut.update(0, myString); // update the datastream
int response = dOut.updatePachube(); // updatePachube() updates by an authenticated PUT HTTP request
println(response); // should be 200 if successful; 401 if unauthorized; 404 if feed doesn't exist
lastUpdate = millis();
}
}
}
// when you've parsed the data you have, ask for more:
myPort.write("A");
}
void onReceiveEEML(DataIn d){
myVariable = d.getValue(2); // get the value of the stream 1
}
.
Final
This final LightShare code is based on Pachuino. It runs on the new Standard_Firmata, ver 2.1, code in Arduino 18. You must import 'pachuino', 'serial' and 'arduino' libraries into your processing sketchbook. The reason that we are able to use this code on pachube.com is the fact that we got whitelisted for the duration of the assignment. This meant that the data cap was removed. It is set up to listen for 1 set of local sensor data and 3 remote sensor feeds;
import processing.serial.*;
import eeml.*;
import cc.arduino.*;
import pachuino.*;
Pachuino p;
DataOut dOut;
float timer, scaledLDR;
float button;
float lastUpdate;
float jacquesLDR;
float tapaniLDR;
float seamusLDR;
float juditLDR;
PImage img;
void setup()
{
p = new Pachuino(this, Arduino.list()[0], 57600);
p.manualUpdate("http://www.pachube.com/api/7472.xml");
p.setKey("APIKEY_GOES_HERE");
dOut = new DataOut(this, "http://www.pachube.com/api/feeds/7472.xml",
"APIKEY_GOES_HERE");
dOut.addData(2,"CombinedLDR");
p.addRemoteSensor("http://www.pachube.com/api/7339.xml", 2); // tapani ldr
p.addRemoteSensor("http://www.pachube.com/api/7344.xml", 2); // jacques ldr
p.addRemoteSensor("http://www.pachube.com/api/7584.xml", 2); // judit ldr
p.addLocalSensor("analog", 1, "ldr");
p.addLocalSensor("analog", 2, "button");
size(600,581);
background(255);
}
void draw()
{
seamusLDR = p.localSensor[0].value;
button = p.localSensor[1].value;
tapaniLDR = p.remoteSensor[0].value;
jacquesLDR = p.remoteSensor[1].value;
juditLDR = p.remoteSensor[2].value;
dOut.update(0, timer);
int response = dOut.updatePachube();
if ((millis() - lastUpdate) > 5000)
{
lastUpdate = millis();
if (button > 10)
{
timer = timer + 1;
scaledLDR = seamusLDR/100;
timer = timer + scaledLDR;
delay(1000);
if (timer > jacquesLDR && timer > tapaniLDR && timer > juditLDR)
{
img = loadImage("mus.jpg");
image (img,0,0);
println("seamus = " + timer);
println("jacques = " + jacquesLDR);
println("tapani = " + tapaniLDR);
println("judit = " + juditLDR);
p.analogWrite(9, 1);
println("off");
delay(500);
p.analogWrite(9, 0);
}
else if (jacquesLDR > timer && jacquesLDR > tapaniLDR && jacquesLDR > juditLDR)
{
img = loadImage("jaak.jpg");
image (img,0,0);
println("seamus = " + timer);
println("jacques = " + jacquesLDR);
println("tapani = " + tapaniLDR);
println("judit = " + juditLDR);
p.analogWrite(9, 250);
println("on");
delay(500);
p.analogWrite(9, 0);
}
else if (juditLDR > timer && juditLDR > tapaniLDR && juditLDR > jacquesLDR)
{
img = loadImage("judit.jpg");
image (img,0,0);
println("seamus = " + timer);
println("jacques = " + jacquesLDR);
println("tapani = " + tapaniLDR);
println("judit = " + juditLDR);
p.analogWrite(9, 250);
println("on");
delay(500);
p.analogWrite(9, 0);
}
else if (tapaniLDR > timer && tapaniLDR > juditLDR && tapaniLDR > jacquesLDR)
{
img = loadImage("tap.jpg");
image (img,0,0);
println("seamus = " + timer);
println("jacques = " + jacquesLDR);
println("tapani = " + tapaniLDR);
println("judit = " + juditLDR);
p.analogWrite(9, 250);
println("on");
delay(500);
p.analogWrite(9, 0);
}
else
{
println("seamus = " + timer);
println("jacques = " + jacquesLDR);
println("tapani = " + tapaniLDR);
println("judit = " + juditLDR);
p.analogWrite(9, 250);
println("on");
delay(500);
p.analogWrite(9, 0);
}
}
else
{
println("seamus = " + 0);
println("jacques = " + jacquesLDR);
println("tapani = " + tapaniLDR);
println("judit = " + juditLDR);
p.analogWrite(9, 1);
println("off");
delay(500);
p.analogWrite(9, 0);
}
}
}
void onReceiveEEML(DataIn d)
{
p.updateRemoteSensors(d);
}
Using this code meant that we could separate the data coming from each persons feed, to deal with them separately in the if and else statements.
Below is the fritzing diagram of the circuit and an image of the finished switch box. In the final we used a Potpin instead of a toggle switch just to save a bit of cash. Worked nicely.


This unit fit over the lightswitch in my room. The servo inside physically switched my light on if I had the greatest light value.
Monday, June 7, 2010
LIGHT SHARE - 4 PEOPLE SHARE 3 LIGHTS VIA A WEB BASED SMART SYSTEM
Overview
This project has grown a lot since original conception to become Light Share. Whilst building this smart system, our group figured out how to control, syndicate and automate systems remotely, in many locations simultaneously.
Check out some of the landmarks on the way to achieving communication between the physical, digital and cyber elements of Light Share in my previous posts.
--------------------------------------------------------------
Concept and Direction
We set out to design a smart system, which allows people to interact with others from multiple locations, using physical and digital programing to share resource and responsibility for decisions of energy consumption within the network.
Two key principles of this project are;
Jacques found a sketch called Pachuino on the net.
Below is a copy of Mine and Judit's code. This allowed us to achieve the goal of simultaneously controlling one-anothers servo's;
import processing.serial.*;
Serial myPort;
boolean firstContact = false
boolean controlServo = false;
//setup for pachube recieving
import eeml.*;
DataIn dIn;
float myVariable;
//setup for pachube sending
DataOut dOut;
float lastUpdate;
int buttonState =0;
void setup() {
println(Serial.list());
myPort = new Serial(this, Serial.list()[0], 9600);
myPort.bufferUntil('\n');
// set up DataIn object; indicate the URL you want, your Pachube API key, and how often you want it to update
dIn = new DataIn(this,"http://www.pachube.com/api/feeds/7584.xml",
"YourAPIcodegoeshere", 7000);
// set up DataOut object; requires URL of the EEML you are updating, and your Pachube API key
dOut = new DataOut(this, "http://www.pachube.com/api/feeds/7472.xml",
"YourAPIcodegoeshere");
dOut.addData(2,"button");
dOut.addData(3,"ldr");
}
void draw() {
background(255);
}
bufferUntil()
void serialEvent(Serial myPort) {
// read the serial buffer:
String myString = myPort.readStringUntil('\n');
// if you got any bytes other than the linefeed:
if (myString != null) {
myString = trim(myString);
// if you haven't heard from the microncontroller yet, listen:
if (firstContact == false) {
if (myString.equals("hello")) {
myPort.clear(); // clear the serial port buffer
firstContact = true; // you've had first contact from the microcontroller
myPort.write('A'); // ask for more
println(firstContact);
}
}
// if you have heard from the microcontroller, proceed:
else {
int sensors[] = int(split(myString, ','));
// print out the values you got:
for (int sensorNum = 0; sensorNum <> 1) {
if (myVariable == 1){
myPort.write("B");
} else {
myPort.write("C");
}
println(sensors[0]);
//send data to pachube
if ((millis() - lastUpdate) > 7000){
if(sensors[0] < response =" dOut.updatePachube();" lastupdate =" millis();" myvariable =" d.getValue(2);">
}
--------------------------------------------------------------
Remote Communication During the Project
Skype was very handy for extra communication when working from different locations. This became most evident when we had finalised the code and we're ready to implement the system from our homes, via the web.
Also, we were able to do troubleshooting from home, walking each other through possible solutions. We even encountered our lecturer in the computer lab whilst doing a remote troubleshooting session. Awesome.
-----------------------------------------------
Concept and Operation Refinement
Once we had the button/LDR/pachube/servo sketches working we spotted a flaw in our logic, which stemmed from the conceptual roots of our project.
The issue came to the surface when we started trying to describe the meaning behind what was taking palce in our system. To sort this we wrote out 6 or 7 diagram variations of the logic and interactions we were trying to achieve, then eliminated possibilities as we discovered blocks.
float timer, LDRvalue, scaledLDR;
void setup(){
Serial.begin(9600);
timer = 0;
}
void loop() {
LDRvalue = analogRead(1);
if (LDRvalue > 100){
scaledLDR = LDRvalue/100;
timer = timer + scaledLDR;
Serial.println(timer);
delay(1000);
}
}
-----------------------------------------------
Working eeml/FirstContact/Serial Code
import processing.serial.*;
Serial myPort;
boolean firstContact = false;
boolean controlServo = false;
//setup for pachube recieving
import eeml.*;
DataIn dIn;
float myVariable;
//setup for pachube sending
DataOut dOut;
float lastUpdate;
int buttonState =0;
void setup() {
println(Serial.list());
myPort = new Serial(this, Serial.list()[1], 9600);
myPort.bufferUntil('\n');
dIn = new DataIn(this,"http://www.pachube.com/api/feeds/7344.xml",
"YourAPIcodehere", 7000);
dOut = new DataOut(this, "http://www.pachube.com/api/feeds/7472.xml",
"YourAPIcodehere");
dOut.addData(4,"musValue");
}
void draw() {
background(255);
}
void serialEvent(Serial myPort) {
// read the serial buffer:
String myString = myPort.readStringUntil('\n');
// if you got any bytes other than the linefeed:
if (myString != null) {
myString = trim(myString);
// if you haven't heard from the microncontroller yet, listen:
if (firstContact == false) {
if (myString.equals("hello")) {
myPort.clear(); // clear the serial port buffer
firstContact = true; // you've had first contact from the microcontroller
myPort.write('A'); // ask for more
println(firstContact);
}
}
// if you have heard from the microcontroller, proceed:
else {
float recievedData = new Float(myVariable);
float myData = new Float (myString);
println ("mine = "+myData);
println ("judit = "+recievedData);
if (myData > recievedData){
myPort.write("B");
} else {
myPort.write("C");
}
//send data to pachube
if ((millis() - lastUpdate) > 7000){
println("ready to POST: ");
dOut.update(0, myString); // update the datastream
int response = dOut.updatePachube(); // updatePachube() updates by an authenticated PUT HTTP request
println(response); // should be 200 if successful; 401 if unauthorized; 404 if feed doesn't exist
lastUpdate = millis();
}
}
}
myPort.write("A");
}
void onReceiveEEML(DataIn d){
myVariable = d.getValue(2); // get the value of the stream 1
// println(myVariable);
}
Arduino;
float timer, LDRvalue, scaledLDR;
int sensorValue = 0; // reading from the sensor
int servoControl;
#include
Servo myservo;
//int pos = 0;
void setup() {
// configure the serial connection:
Serial.begin(9600);
// configure the digital input:
myservo.attach(9);
establishContact();
}
void loop() {
// read the sensor:
LDRvalue = analogRead(1);
if (LDRvalue > 100){
scaledLDR = LDRvalue/100;
timer = timer + scaledLDR;
delay(1000);
}
if (Serial.available() > 0) {
// read the incoming byte:
int inByte = Serial.read();
Serial.println(timer);
if(inByte == 66){
myservo.write(180);
}
if(inByte == 67){
myservo.write(0);
}
}
}
void establishContact() {
while (Serial.available() <= 0) { Serial.println("hello"); // send a starting message delay(300); } }
.
These sketches only have only has two users in the system but shows how the Processing and Arduino work together.
This project has grown a lot since original conception to become Light Share. Whilst building this smart system, our group figured out how to control, syndicate and automate systems remotely, in many locations simultaneously.

Check out some of the landmarks on the way to achieving communication between the physical, digital and cyber elements of Light Share in my previous posts.
--------------------------------------------------------------
Concept and Direction
We set out to design a smart system, which allows people to interact with others from multiple locations, using physical and digital programing to share resource and responsibility for decisions of energy consumption within the network.
Two key principles of this project are;
- We affect others by our actions and the amount of resource we use day-to-day.
- We don't have enough resource for every one in the world unless we share more fairly.
--------------------------------------------------------------
Start Up
Initially we were going to have buttons to request light and approve others to have light. This presented us with the first major battle - making two systems, in seperate locations talk to each other via the net.
We used http://www.pachube.com/ as our data host, each member of the team regestering thier own account and feeds.
We used 'Standard Firmata', 'servo_sweep', 'button' and 'FirstContact' (Tom Igoe) examples to get this working - First from my button to Judit's servo, then both controlling one-anothers servo's.
The problem we encountered here was that StandardFirmata didn't cooperate to control servo's and we couldn't figure out how to integrate the 'ServoFirmata' code.

First, we figured out how to communicate between Processing and Arduino, to send values from Arduino components and drive the servo;
//processing language;
import processing.serial.*;
Serial myPort;
//float bgcolor; // Background color
float fgcolor; // Fill color
float xpos, ypos; // Starting position of the ball
boolean firstContact = false;
boolean controlServo = false;
void setup() {
size(640,480);
println(Serial.list());
myPort = new Serial(this, Serial.list()[0], 9600);
myPort.bufferUntil('\n');
}
void draw() {
background(255);
fill(fgcolor);
// Draw the shape
ellipse(xpos, ypos, 20, 20);
}
bufferUntil()
void serialEvent(Serial myPort) {
String myString = myPort.readStringUntil('\n');
if (myString != null) {
myString = trim(myString);
if (firstContact == false) {
if (myString.equals("hello")) {
myPort.clear();
firstContact = true;
myPort.write('A');
println(firstContact);
}
}
else {
int sensors[] = int(split(myString, ','));
for (int sensorNum = 0; sensorNum <>
println(); if (sensors.length > 1) {
xpos = map(sensors[0], 0,400,0,width);
ypos = map(sensors[1], 0,400,0,height);
fgcolor = sensors[2] * 255;
if (sensors[2] == 1){
myPort.write("B");
} else {
myPort.write("C");
}
}
}
myPort.write("A");
}
}
Processing sends a button state reading (0 = 'off', 1 = on) to pachube.com, reads the state value from another feed, then sends an ASCII value to Arduino to control the position of the servo/switch.
Below is the arduino version of our FirstContact sketch variation;
int analogOne = 0; // analog input
int analogTwo = 1; // analog input
int digitalOne = 2; // digital input
int sensorValue = 0; // reading from the sensor
int servoControl;
#include
Servo myservo;
//int pos = 0;
void setup() {
// configure the serial connection:
Serial.begin(9600);
// configure the digital input:
pinMode(digitalOne, INPUT);
myservo.attach(9);
establishContact();
}
void loop() {
if (Serial.available() > 0) {
int inByte = Serial.read();
sensorValue = analogRead(analogOne);
Serial.print(sensorValue, DEC);
Serial.print(",");
sensorValue = analogRead(analogTwo);
Serial.print(sensorValue, DEC);
Serial.print(",");
sensorValue = digitalRead(digitalOne);
Serial.println(sensorValue, DEC);
if(inByte == 66){
myservo.write(180);
}
if(inByte == 67){
myservo.write(0);
}
}
}
void establishContact() {
while (Serial.available() <= 0) { Serial.println("hello"); // send a starting message delay(300); } }
------------------------------------------------------------
Pachube Drama
A big block in the road came in the form of pachube's upload/download resrictions. You can access or upload data once every 3.5 seconds aprox with a single API key. This meant that when it came to updating 1 stream and listening for others we had to have massive delays to prevent pachube from freezing our accounts (which happened many times anyway).
As we wanted multiple info streams to intergate all members of the group into the system, we had to find a way to circumvent this issue.
We discovered two possible solutions so we split the group in 2;
Judit and I worked by building onto our adaptation of FirstContact, intergating an LDR as a control device, into what we had already achieved so far in previous versions.

Jacques found a sketch called Pachuino on the net.
Below is a copy of Mine and Judit's code. This allowed us to achieve the goal of simultaneously controlling one-anothers servo's;
import processing.serial.*;
Serial myPort;
boolean firstContact = false
boolean controlServo = false;
//setup for pachube recieving
import eeml.*;
DataIn dIn;
float myVariable;
//setup for pachube sending
DataOut dOut;
float lastUpdate;
int buttonState =0;
void setup() {
println(Serial.list());
myPort = new Serial(this, Serial.list()[0], 9600);
myPort.bufferUntil('\n');
// set up DataIn object; indicate the URL you want, your Pachube API key, and how often you want it to update
dIn = new DataIn(this,"http://www.pachube.com/api/feeds/7584.xml",
"YourAPIcodegoeshere", 7000);
// set up DataOut object; requires URL of the EEML you are updating, and your Pachube API key
dOut = new DataOut(this, "http://www.pachube.com/api/feeds/7472.xml",
"YourAPIcodegoeshere");
dOut.addData(2,"button");
dOut.addData(3,"ldr");
}
void draw() {
background(255);
}
bufferUntil()
void serialEvent(Serial myPort) {
// read the serial buffer:
String myString = myPort.readStringUntil('\n');
// if you got any bytes other than the linefeed:
if (myString != null) {
myString = trim(myString);
// if you haven't heard from the microncontroller yet, listen:
if (firstContact == false) {
if (myString.equals("hello")) {
myPort.clear(); // clear the serial port buffer
firstContact = true; // you've had first contact from the microcontroller
myPort.write('A'); // ask for more
println(firstContact);
}
}
// if you have heard from the microcontroller, proceed:
else {
int sensors[] = int(split(myString, ','));
// print out the values you got:
for (int sensorNum = 0; sensorNum <> 1) {
if (myVariable == 1){
myPort.write("B");
} else {
myPort.write("C");
}
println(sensors[0]);
//send data to pachube
if ((millis() - lastUpdate) > 7000){
if(sensors[0] < response =" dOut.updatePachube();" lastupdate =" millis();" myvariable =" d.getValue(2);">
}
--------------------------------------------------------------
Remote Communication During the Project
Skype was very handy for extra communication when working from different locations. This became most evident when we had finalised the code and we're ready to implement the system from our homes, via the web.
Also, we were able to do troubleshooting from home, walking each other through possible solutions. We even encountered our lecturer in the computer lab whilst doing a remote troubleshooting session. Awesome.
-----------------------------------------------
Concept and Operation Refinement
Once we had the button/LDR/pachube/servo sketches working we spotted a flaw in our logic, which stemmed from the conceptual roots of our project.
The issue came to the surface when we started trying to describe the meaning behind what was taking palce in our system. To sort this we wrote out 6 or 7 diagram variations of the logic and interactions we were trying to achieve, then eliminated possibilities as we discovered blocks.

float timer, LDRvalue, scaledLDR;
void setup(){
Serial.begin(9600);
timer = 0;
}
void loop() {
LDRvalue = analogRead(1);
if (LDRvalue > 100){
scaledLDR = LDRvalue/100;
timer = timer + scaledLDR;
Serial.println(timer);
delay(1000);
}
}
-----------------------------------------------
Working eeml/FirstContact/Serial Code
import processing.serial.*;
Serial myPort;
boolean firstContact = false;
boolean controlServo = false;
//setup for pachube recieving
import eeml.*;
DataIn dIn;
float myVariable;
//setup for pachube sending
DataOut dOut;
float lastUpdate;
int buttonState =0;
void setup() {
println(Serial.list());
myPort = new Serial(this, Serial.list()[1], 9600);
myPort.bufferUntil('\n');
dIn = new DataIn(this,"http://www.pachube.com/api/feeds/7344.xml",
"YourAPIcodehere", 7000);
dOut = new DataOut(this, "http://www.pachube.com/api/feeds/7472.xml",
"YourAPIcodehere");
dOut.addData(4,"musValue");
}
void draw() {
background(255);
}
void serialEvent(Serial myPort) {
// read the serial buffer:
String myString = myPort.readStringUntil('\n');
// if you got any bytes other than the linefeed:
if (myString != null) {
myString = trim(myString);
// if you haven't heard from the microncontroller yet, listen:
if (firstContact == false) {
if (myString.equals("hello")) {
myPort.clear(); // clear the serial port buffer
firstContact = true; // you've had first contact from the microcontroller
myPort.write('A'); // ask for more
println(firstContact);
}
}
// if you have heard from the microcontroller, proceed:
else {
float recievedData = new Float(myVariable);
float myData = new Float (myString);
println ("mine = "+myData);
println ("judit = "+recievedData);
if (myData > recievedData){
myPort.write("B");
} else {
myPort.write("C");
}
//send data to pachube
if ((millis() - lastUpdate) > 7000){
println("ready to POST: ");
dOut.update(0, myString); // update the datastream
int response = dOut.updatePachube(); // updatePachube() updates by an authenticated PUT HTTP request
println(response); // should be 200 if successful; 401 if unauthorized; 404 if feed doesn't exist
lastUpdate = millis();
}
}
}
myPort.write("A");
}
void onReceiveEEML(DataIn d){
myVariable = d.getValue(2); // get the value of the stream 1
// println(myVariable);
}
Arduino;
float timer, LDRvalue, scaledLDR;
int sensorValue = 0; // reading from the sensor
int servoControl;
#include
Servo myservo;
//int pos = 0;
void setup() {
// configure the serial connection:
Serial.begin(9600);
// configure the digital input:
myservo.attach(9);
establishContact();
}
void loop() {
// read the sensor:
LDRvalue = analogRead(1);
if (LDRvalue > 100){
scaledLDR = LDRvalue/100;
timer = timer + scaledLDR;
delay(1000);
}
if (Serial.available() > 0) {
// read the incoming byte:
int inByte = Serial.read();
Serial.println(timer);
if(inByte == 66){
myservo.write(180);
}
if(inByte == 67){
myservo.write(0);
}
}
}
void establishContact() {
while (Serial.available() <= 0) { Serial.println("hello"); // send a starting message delay(300); } }
.
These sketches only have only has two users in the system but shows how the Processing and Arduino work together.
Thursday, June 3, 2010
USING PROCESSING AND ARDUINO TO CONTROL A SERVO VIA THE INTERNET
This is is an example of how to hook up an Arduino to Processing, to talk to the internet -sending a digital reading to the net, then using that info to control a servo in a seperate location.
Next we hooked up a servo to one of the PWM pins on the Arduino. We called data in dIn from the feed in the first example, then used the button state reading to determine whether the servo sat at 0 or 180 degrees. On or Off.
import eeml.*;
import processing.serial.*;
import cc.arduino.*;
Arduino arduino;
float myVariable;
//int servoPin = 10; // Control pin for servo motor
DataIn dIn;
void setup(){
size (180, 50);
// set up DataIn object; indicate the URL you want, your Pachube API key, and how often you want it to update
// e.g. every 15 seconds
dIn = new DataIn(this,"http://www.pachube.com/api/feeds/7472.xml",
"yourAPIyourAPI24bbc4622f0d5fb86c1fe75d61", 5000);
arduino = new Arduino(this, Arduino.list()[0]);
arduino.pinMode(10, Arduino.OUTPUT);
}
void draw()
{
if (myVariable == 0.0) {
arduino.analogWrite(10, 0);
println("off");
} else {
println("on");
arduino.analogWrite(10, 180);
}
}
// onReceiveEEML is run every time your app receives back EEML that it has requested from a Pachube feed.
void onReceiveEEML(DataIn d){
myVariable = d.getValue(2); // get the value of the stream 2
println(myVariable);
}
In this example analogWrite tells the servo which position to be in, writing the value pulled from our feed to the PWM pin 10 that the servo is connected to.

We used the Standard Firmata sketch in Arduino to communicate with Processing, which functions in this example, as the intermediary and facilitator between physical devices of my Arduino circuit and the web.
The beauty of this sort of set up is that you could control any number of devices remotely from anywhere in the world.
To do this you will need to download the latest version's of Processing (1.1) and Arduino (18). Then download and import the 'arduino' and 'eeml' libraries into your Processing sketchbook library.
Also, you will need to use a data share server on the net to host your sensor feeds. For this example we used http://www.pachube.com/, a free site designed for this sort of application (this is a useful site but can be limiting later down the line due to data transfer caps).
We started by sending a button state reading to pachube. 0 for 'off' and 1 for 'on'. This is based on the 'eeml' example in Processing;
import eeml.*;
import processing.serial.*;
import cc.arduino.*;
Arduino arduino;
DataOut dOut;
float lastUpdate;
int buttonState =0;
void setup(){
// set up DataOut object; requires URL of the EEML you are updating, and your Pachube API key
dOut = new DataOut(this, "http://www.pachube.com/api/feeds/7472.xml", "yourAPIyourAPI24bbc4622f0d5fb86c1fe75d61");
// and add and tag a datastream
dOut.addData(2,"button");
arduino = new Arduino (this, Arduino.list()[0],57600);
arduino.pinMode(2,arduino.INPUT);
}
void draw()
{
// update once every 5 seconds (could also be e.g. every mouseClick)
if ((millis() - lastUpdate) > 5000){
buttonState=arduino.digitalRead(2);
println("ready to POST: ");
dOut.update(0, buttonState); // update the datastream
int response = dOut.updatePachube(); // updatePachube() updates by an authenticated PUT HTTP request
println(response); // should be 200 if successful; 401 if unauthorized; 404 if feed doesn't exist
lastUpdate = millis();
}
}
The feed that dOut is sending to is in green.
The blue code is where you put your unique API code from pachube. This is issued to you when you create an account at pachube.com
-------------------------------------------------------------------
Next we hooked up a servo to one of the PWM pins on the Arduino. We called data in dIn from the feed in the first example, then used the button state reading to determine whether the servo sat at 0 or 180 degrees. On or Off.
import eeml.*;
import processing.serial.*;
import cc.arduino.*;
Arduino arduino;
float myVariable;
//int servoPin = 10; // Control pin for servo motor
DataIn dIn;
void setup(){
size (180, 50);
// set up DataIn object; indicate the URL you want, your Pachube API key, and how often you want it to update
// e.g. every 15 seconds
dIn = new DataIn(this,"http://www.pachube.com/api/feeds/7472.xml",
"yourAPIyourAPI24bbc4622f0d5fb86c1fe75d61", 5000);
arduino = new Arduino(this, Arduino.list()[0]);
arduino.pinMode(10, Arduino.OUTPUT);
}
void draw()
{
if (myVariable == 0.0) {
arduino.analogWrite(10, 0);
println("off");
} else {
println("on");
arduino.analogWrite(10, 180);
}
}
// onReceiveEEML is run every time your app receives back EEML that it has requested from a Pachube feed.
void onReceiveEEML(DataIn d){
myVariable = d.getValue(2); // get the value of the stream 2
println(myVariable);
}
In this example analogWrite tells the servo which position to be in, writing the value pulled from our feed to the PWM pin 10 that the servo is connected to.

Pushing a button in one room, which controls a servo in another may seem like small stuff, but has many practical and fun applications.
FIRST BREAKTHROUGH - USING 2 POTENTIOMETERS TO CONTROL SHAPE AND COLOUR VARIABLES IN PROCESSING
Below is a very simple sketch that Tapani and I wrote, using two potentiometers to control colour and shape variables in a simple Processing 1.1, beginners sketch. I cant quite remember what we used the third value for. An LED perhaps..?
Try this sketch yourself;
import processing.serial.*;
import cc.arduino.*;
Arduino arduino;
int value;
int value2;
int value3;
void setup()
{
size(600,600);
arduino = new Arduino (this, Arduino.list()[0],57600);
}
void draw(){
background(0);
value=arduino.analogRead(0);
value2=arduino.analogRead(1);
value3=arduino.analogRead(2);
value= int(map(value,0,1023,0,255));
value2= int(map(value2,0,1023,0,255));
value3= int(map(value3,0,1023,0,255));
arduino.analogWrite(9,(value+value2)/2);
//println (value);
//println ((value+value2)/2);
println(value3);
smooth();
fill (value/2,value2/3,(value+value2)/2);
ellipse (value*2/*+random(100,255)*/,value2*2,value3,value3);
ellipse (value*random(0,5),value2*random(0,5),50,50);
ellipse (value*random(0,5),value2*random(0,5),50,50);
}
We imported the potentiometer data, via arduino Serial, to the serial port, then into the Processing sketch;
import processing.serial.*;
import cc.arduino.*;
we mapped the values from the potentiometers from between 0-1023, to 0-255 and added some simple mathematical equasions to the shapes which you can play around with and expand on.
This was the first breakthrough I'd made interfacing physical programming in Arduino and digital graphics in Processing. Was very exciting (cheery, yet somehow cynical laughter in background)!!! ....

Subscribe to:
Posts (Atom)
